Cross-sell Overview
The Smart Cross-Sell tool is designed to increase your average shopping cart value by targeting your buyers with tailored offers at just the right time in their acquisition process.
The default view of the Smart Cross-Sell section displays a dashboard of your existing cross-sell campaigns, with each campaign consisting of the following fields:
- id
- name
- creation date
- active period
- status
Create New Campaign
To create a new cross-sell campaign, click the Add cross sells button at the top right corner of the page.
In the newly opened window, you will be asked to input the basic details of your new cross-sell campaign:
| Status | Activate or deactivate your cross-sell campaign. |
| Name | Add the name of your new campaign, making sure it is descriptive and relevant to your campaign's target product, period, or other parameters. |
| Description | Add a description for the product you wish to promote through your cross-sell campaign. |
| Active period | Select the period for which your campaign will be active. A calendar selection tool allows you to define your campaign's start and end dates. |
| Sticky offer | Enable this checkbox when planning to add an upsell offer for your product and display a cross-sale promotion to the upsell added if the customer accepts it. |
| Cross-sell products | From the prepopulated list of products you have added to your portfolio, select the product(s) for which you want to activate your cross-sell campaign. Whenever a buyer adds this product to their shopping cart, the cross-sell campaign will activate and target them with complementary products. |
| Quantity | A dropdown list where you can select the following quantity options:
|
| Cross-sell flow | Select between a chain cross-sell mechanism (with 1, 2, or 3 steps) and a tree version (with either 1, 2, or 3 steps). The tree cross-sell option allows you to define the criteria or user actions that trigger the consecutive steps and subsequent display of a specific product. |
Screenshot
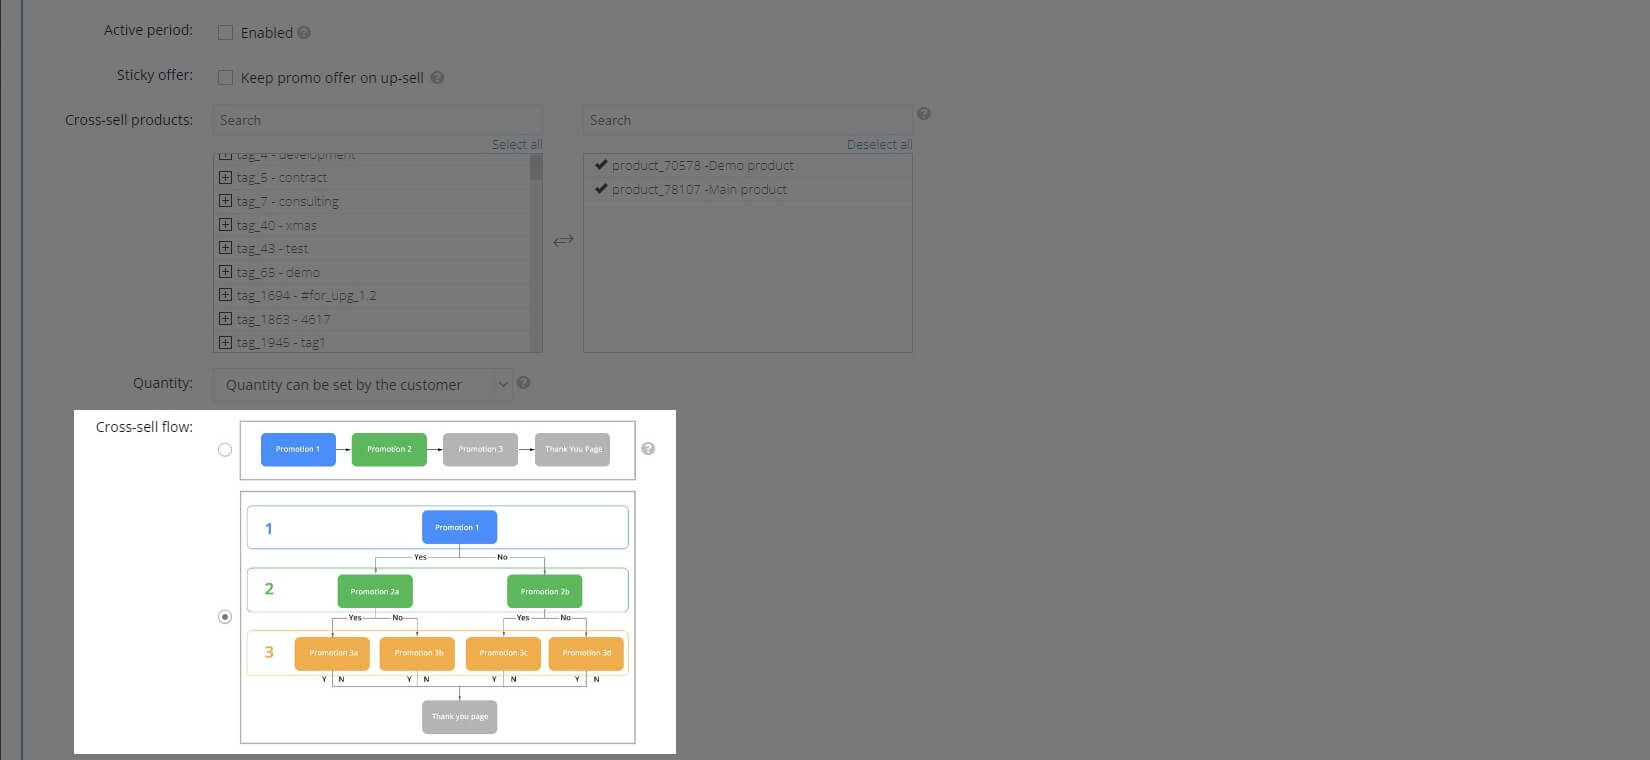
If you plan to include more than one secondary product in your cross-sell campaign, we recommend using the multi-step tree version. Based on your buyer's interaction with your secondary promoted product, such as their approval or refusal of the presented offer, you will be able to define the 2nd, and 3rd offers to be displayed.
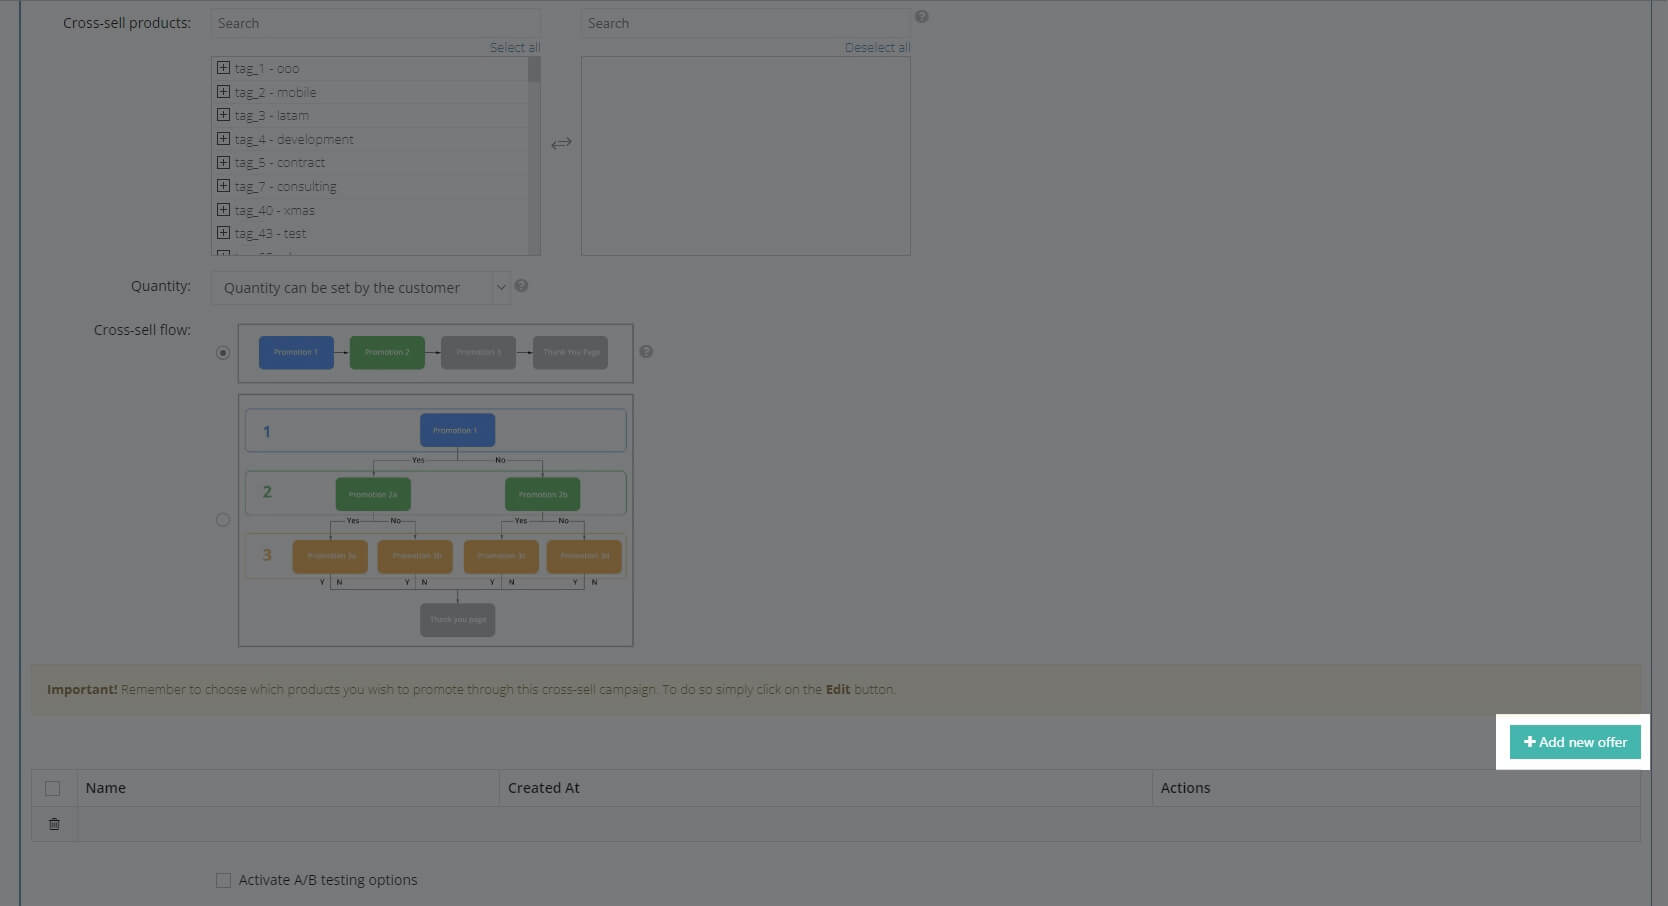
After filling in the basic information regarding your campaign, you can click the Add new offer button at the bottom of the page to define the advanced settings.
Screenshot
Once you've accessed the advanced settings section, you will be asked to add additional details for your campaign based on the cross-sell mechanism you have chosen - chain or tree.
You can always check the current model you're editing by looking at the upper half of your window. The graphic shown there will indicate whether it is a linear or dynamic model.
If you have opted for the chain model, you will be asked to detail every step of the cross-sell, including:
| Name | Set a title for the first promotion you want to show to your buyers. |
| Description | Add the product description, exactly as you want it to be displayed to your buyers on the checkout page. You may add multiple versions of this description for every language you support. |
| Promotion product | Select one product to promote from the products available in your portfolio. |
| Product logo | Upload the product logo/image you wish to be displayed to your buyers. |
| Discount | Choose between offering the discount as a percentage of the product's regular price or as a fixed value of its price. |
Let's take a closer look at the Promotion Location option that is only available for Promotion 1 in any cross-sell flow option. It allows you to choose whether you want your first promotion to appear:
- On the checkout page before the customer submits their order.
- The checkout page option lets you offer multiple products in one promotion that you can add by clicking the Add product button. This will add more product configurations below.
- As a pop-up shown after the order has already been submitted. The pop-up version requires a few more settings to be configured:
- Clock countdown - if you wish to limit the visibility of your pop-up window to a certain amount of time, check this option and define its duration in seconds.
- Skip promotions - if your campaign will include multiple steps, with each of these steps featuring a different product or promotion, you can select between:
- Displaying all steps of the campaign to your users.
- Limit the products displayed to the ones you have set up for this step and allow your users to select between Yes (acquisition) or No (proceed without further purchases). Once they choose, your users will be automatically redirected to the Thank You page.
- Cross-sell design style - choose between a default design available for cross-sell campaigns or a custom one. Selecting the custom option will give you the drop-down list of pop-up templates in Store settings -> Pop-up templates.
You can now proceed to steps 2 and 3 to further build your cross-sell campaign.
To add additional products to your cross-sell offer, tick the checkbox Use step 2 and fill in the required details.
Screenshot
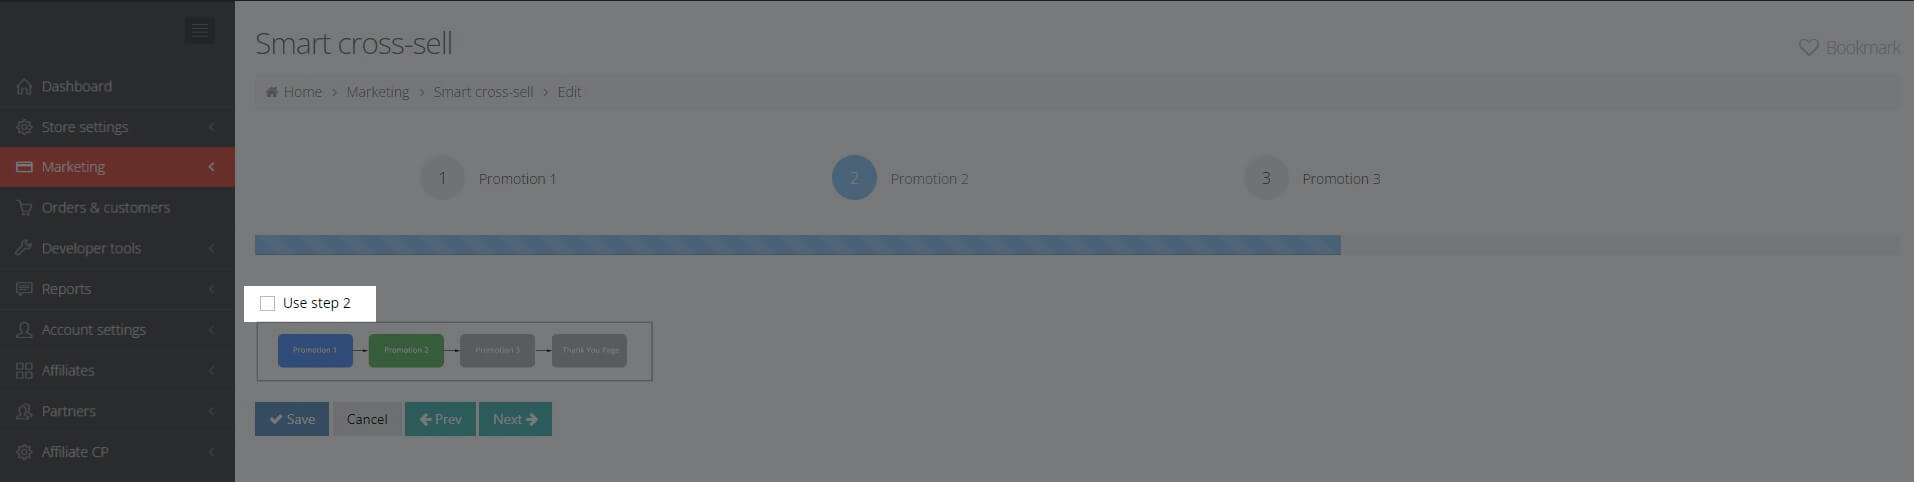
They are the same as those described above. Follow the same steps if you want to use the Promotion 2 option.
The products added to Promotion 2 and 3 can only be displayed as a pop-up.
A/B Testing
Once you have completed setting up your campaign, you can enable A/B testing by selecting the Activate A/B testing options checkbox.
On this screen, you can test and apply the best-performing campaign to the products of your choice.
Our A/B testing functionality allows you to test the effectiveness of your campaigns against four criteria:
- A specific sales target or volume
- A specific revenue level in the currency of your choosing
- A fixed number of views on your checkout pages
- The results generated within a specific time range, as defined by you
To initiate an A/B testing session, you must have at least two active cross-sell offers. The “winning” test result is also predefined by you and can be either the best performing cross-sell offer when the test ends, a preset offer, or your preferred offer chosen from the Performance tests section while the test is still running. You can find out more about A/B testing in the PayPro Lab -> Performance tests section.
To add another test configuration, click Add new offer. Your cross-sell campaign must be inactive for you to add the offers.
Click the Finish button when you have completed setting up your offers. It will appear in the list of offers on the campaign settings page.
You can add as many offers as you wish by selecting the same product and test the results using the same criteria you chose for your A/B testing.
Once you have finished making all the selections and edits for your cross-sell campaign, make sure everything will be integrated into your live campaign by clicking the Save button.